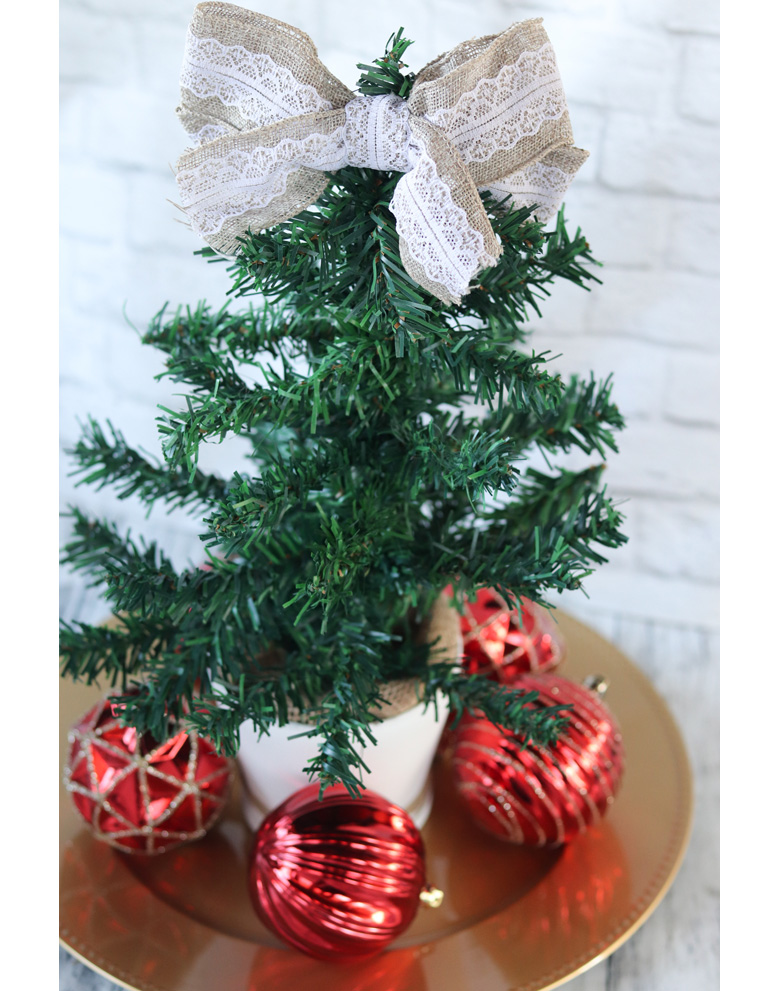
Christmas Tree Table Centerpiece
This Christmas Tree Table Centerpiece is incredibly versatile. It’s very easy, looks elegant, can be customized to fit your own decor and can go just about anywhere you want it in your home.
**I was compensated for this Christmas Tree Table Centerpiece. This post also contains affiliate links and I will be compensated if you make a purchase after clicking on my links with no extra cost to you.
We love making our Christmas decor ourselves, and like taking something and stepping it up a bit. Dollar Tree makes it super easy and helped us put together this Christmas Tree Table Centerpiece.
Just in time for Christmas. Parties, brunches, Christmas day or on your mantel – this centerpiece looks beautiful.
Everything is from the Dollar Tree which makes it inexpensive and festive!
We love the dollar tree, because of course, everything is a dollar which makes projects fun and very inexpensive.
This Christmas Tree Table Centerpiece only cost around $5-7 to make on it’s own, but we went with two tree’s so it was $3 more.
If you haven’t been in a Dollar Tree lately, you’re missing out! Things have changed and they have so many awesome items for your decor.
Things to make, things already made… it’s awesome!
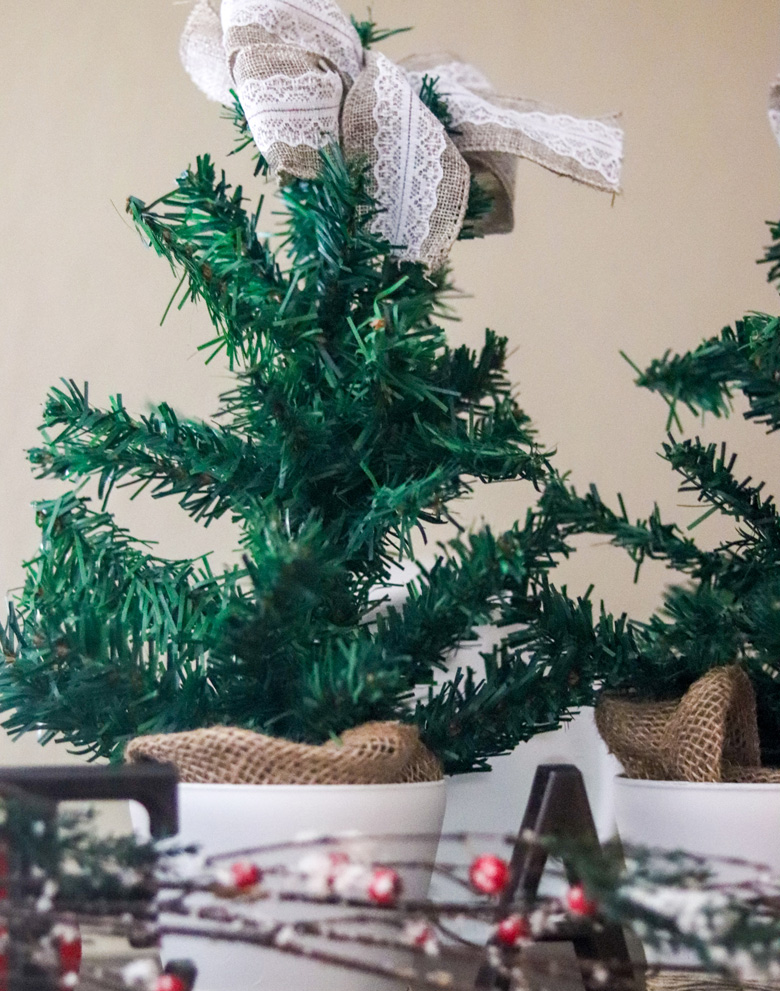
We decided to make this Christmas Tree Table Centerpiece because I had a place for the tree immediately in my normal holiday decor. But I also wanted it to be versatile enough that I could place it on a charger plate and use it as a centerpiece.
We are so happy with how it turned out, all thanks to Dollar Tree.
Use this project as a jumping off point, add lights, mini ornaments or even a large ornament to the candleholder at the end. We inteded to do that, which you will notice if you look at the photo of the supplies.
When I got the centerpiece all done, I just decided I wanted it plain and simple because it matched my simple decor. I added lights, but removed them. I decided not to use the additional candleholder elements. But you need to do what matches your decor.
We picked up several items to make our Christmas Tree Table Centerpiece.
- Tacky Glue and a package of hot glue sticks.
- Candleholders
- a gold charger plate
- jute twine
- pretty floral burlap and lace ribbon
- burlap
- floral foam
We knew it wouldn’t be a difficult project. But we hoped it would be incredible when we had it finished. We love our Christmas Tree Table Centerpiece!
I think the best part of this project was how inexpensive it was. Next in line, is how easy it all was. The worst part was simply waiting for everything to dry but I planned ahead and had a couple of projects going at the same time (coming to the blog soon!)
Like I said, we initially added lights and it looked beautiful. On Christmas eve we intend to use the Christmas Tree Table Centerpiece on our table, so we may be stringing mini lights again.
For now, the lights didn’t fit where we have it displayed.

Ready to see how to make your own Dollar Tree Christmas Tree Table Centerpiece?
Also, if you can’t find any of these items, there are PLENTY of substitutions available at Dollar Tree, so be sure and look around!
Check out the other awesome Dollar Tree Crafts and Dollar Tree DIY’s shared today!
- DIY Christmas Jenga Ornaments by Day to Day Adventures
- Christmas Votive Candle Holders by Family Around the Table
- Holiday Spiced Nuts by Our Good Life
- 20 Amazing Gifts You Can Make- All For Under $1.00 by The Farmer’s Lamp
- Letters to Santa Kits by Tip Garden
Look at these adorable Dollar Tree Holiday Crafts
- Dollar Tree DIY Spooky Halloween Centerpiece
- DIY Dollar Tree Fall Floral Centerpiece
- Handmade Family Frame Last Minute DIY Gift Idea
- DIY Spring Decor from the Dollar Store
- Graduation Flower Vase DIY Craft

Christmas Tree Table Centerpiece
Equipment
- Hot Glue
- Hot Glue Gun
- [scissors]
Materials
- 1 18 ” Dollar Store Christmas Tree Green
- 1 3.5 ” Roman Urn Glass Candleholder
- 1 Roll Burlap Ribbon
- 1 roll Floral Garden Lacy Burlap Ribbon
- 1 roll jute twine
- Gold Plastic Charger Plate with Beaded Trip
- Rust-oleum Flat White Spray Paint
- Strong Adhesive
- 1 Foral Foam Block
Instructions
- Start by spray painting your glass candle holder. I did two coats and allowed to dry in between coats about 2-3 hours. Then allowed to dry overnight.
- Open the Christmas tree, discard the plastic stand pieces and spread the branches out. I used a piece of floral foam, cut down to size, to insert the base of the tree to keep it standing while working with it, as well as to secure it into the candle holder at the end. Secure the tree into the piece of foam and add some glue to keep it sturdy.
- Cut a large piece of floral Garden Lacy Burlap Ribbon according to the bow style you'd like for the top of the tree. Create the bow to your liking and carefully but securely glue it to the top of the tree. Allow to dry according to glue directions. I did all of this the first day so the main part of paint and glue could dry overnight.
- Once the candle holder is dry, cut a long piece of jute twine and secure it it around the base of the candle holder in a decorative fashion. Feel free to keep winding, or overlap or make it the way you want it. Use glue to secure it in place and allow to dry.
- Add glue to the bottom and sides of the floral foam and glue the tree and foam into the candle holder. Allow to dry.
- Once everything is completely dry, insert a long strip of burlap ribbon winding it around the base of the tree, allow it to show coming out of the candle holder.
- Decorate tree according to your tastes.
- Display on a large Gold Plastic Charger plate on the table surrounded in ornaments.