DIY Dollar Tree Fall Floral Centerpiece for Thanksgiving
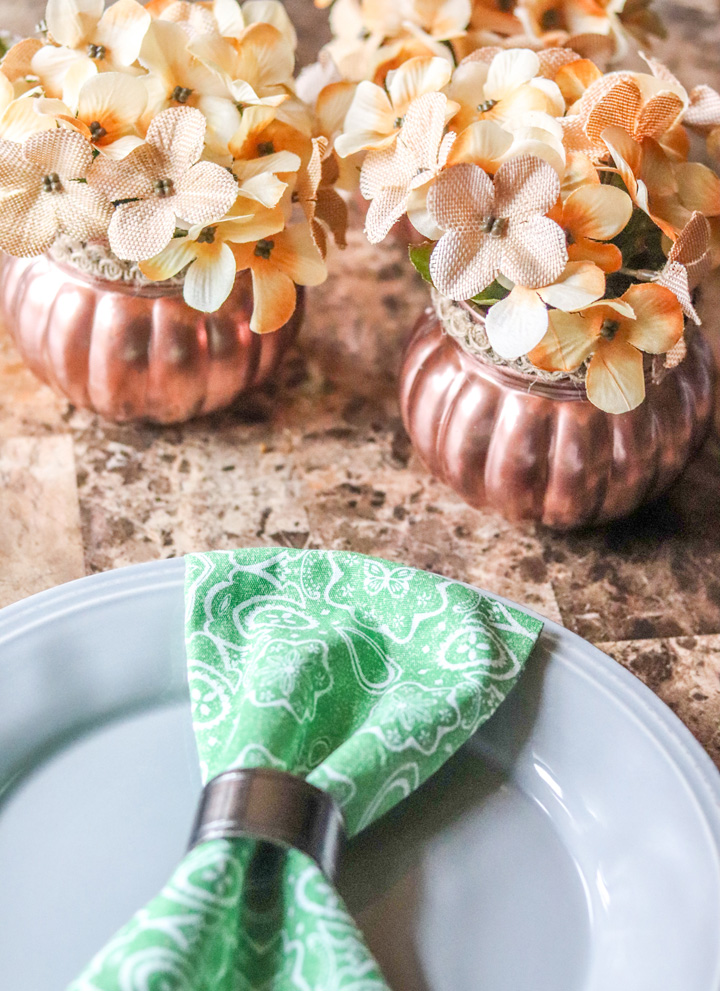
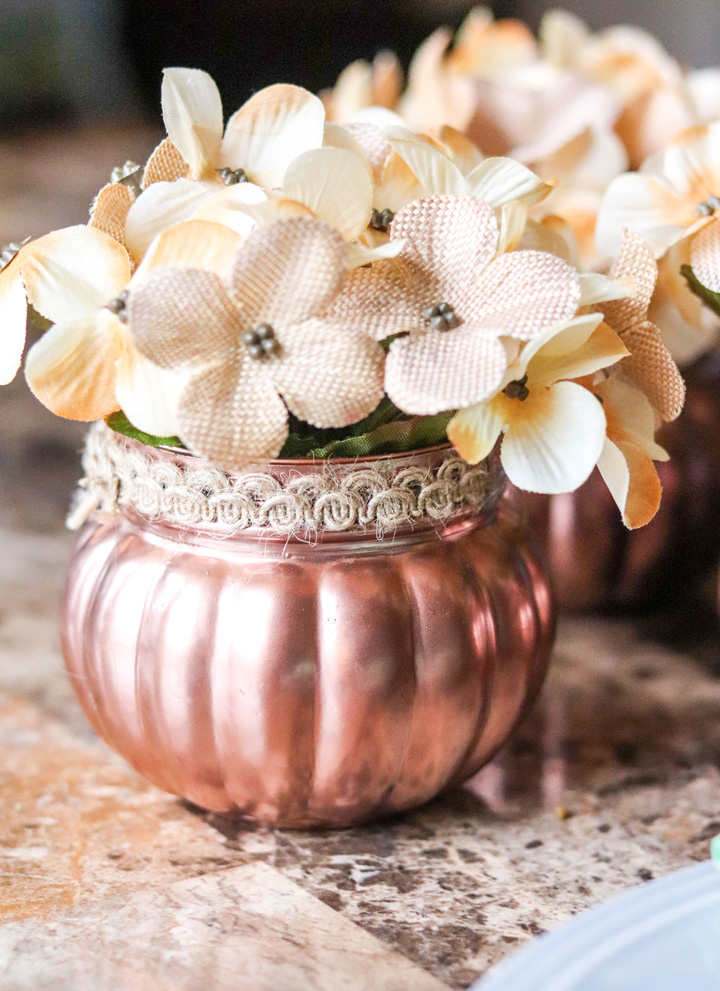
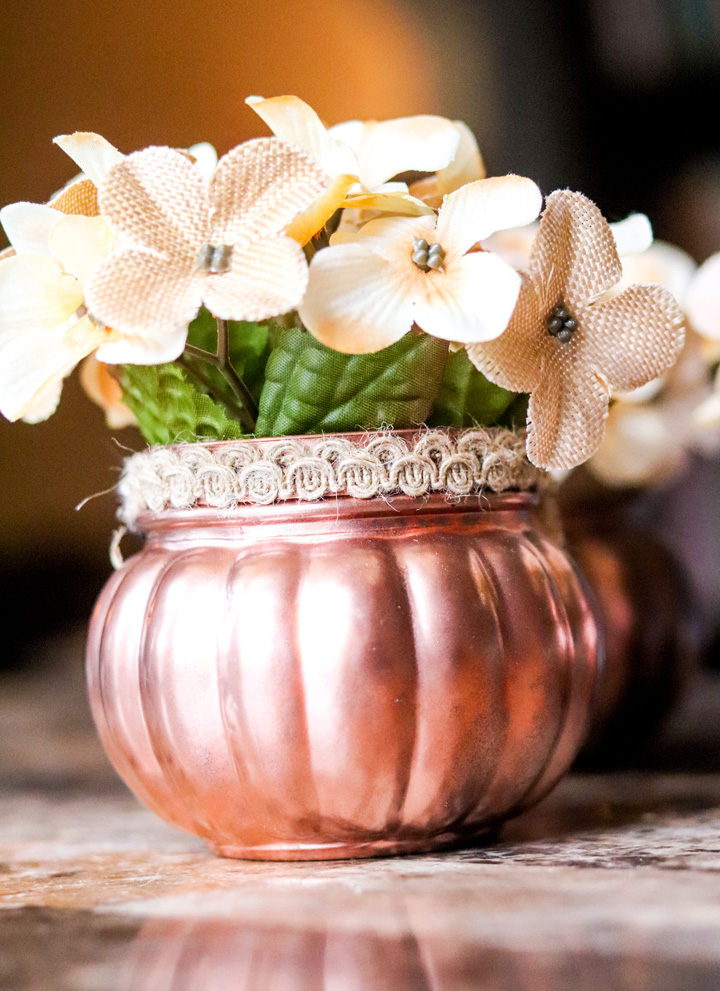
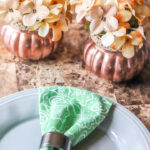
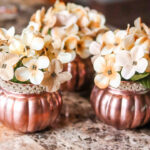
Glass pumpkin jars are painted copper and fitted with fall flowers in this very easy DIY Dollar Tree Fall Floral Centerpiece. It makes a simple, elegant and inexpensive Thanksgiving decoration!
While shopping at Dollar Tree, I happened upon these absolutely adorable glass pumpkins. They don’t have lids, so I immediately thought how cute they might be as a thanksgiving centerpiece.
Thus, that’s the start of my DIY Dollar Tree Fall Floral Centerpiece. Just in time for Thanksgiving. (which I am hosting!)
When choosing paint, I was inspired by a similar DIY tutorial I remembered seeing on Pinterest. The paint used was copper and I loved how it looked.
After comparing the copper to the floral bunches I picked up also at Dollar Tree, I felt that copper would be the perfect color to turn these orange glass pumpkins into something more special.
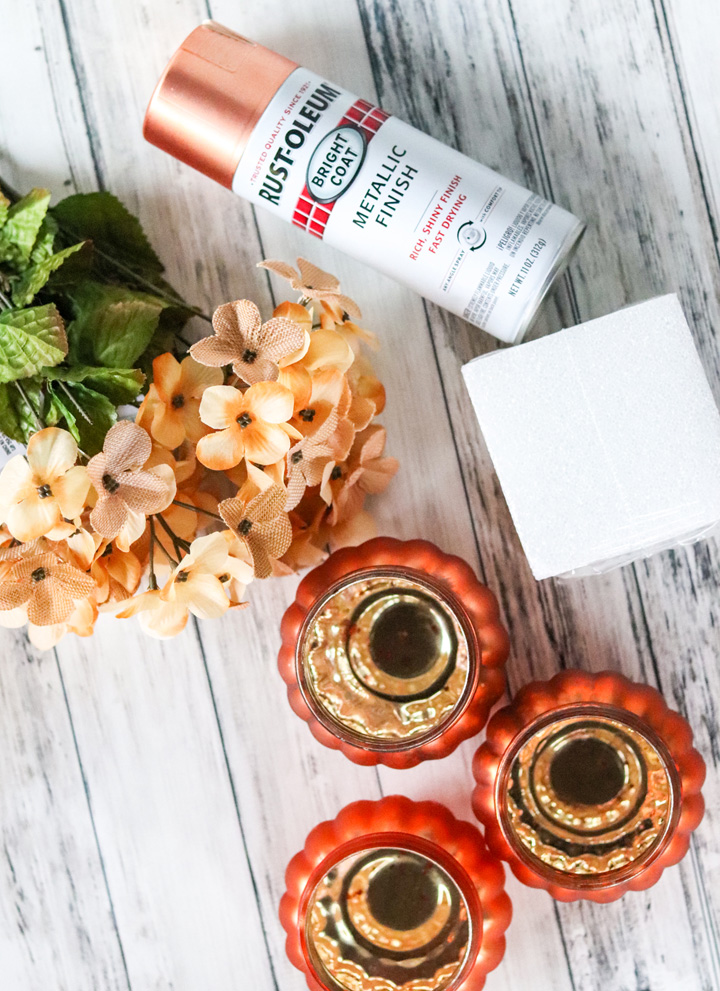
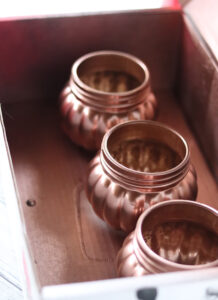
To show you how inexpensive this project is, I got everything I needed EXCEPT the paint and fancy hemp rope at Dollar Tree. From Dollar Tree, I purchased 3 glass pumpkin jars, 3 floral bouquets, 1 styrofoam square and hot glue.
Dollar Tree also has jute and rope that could be used in place of hemp rope if you don’t have it. I happened to have some and when I finished assembling everything, I felt like something was missing.
I just wanted something a little extra and while I have both jute and the rope from Dollar Tree, I liked this just a bit better. Either way it’s going to look amazing.
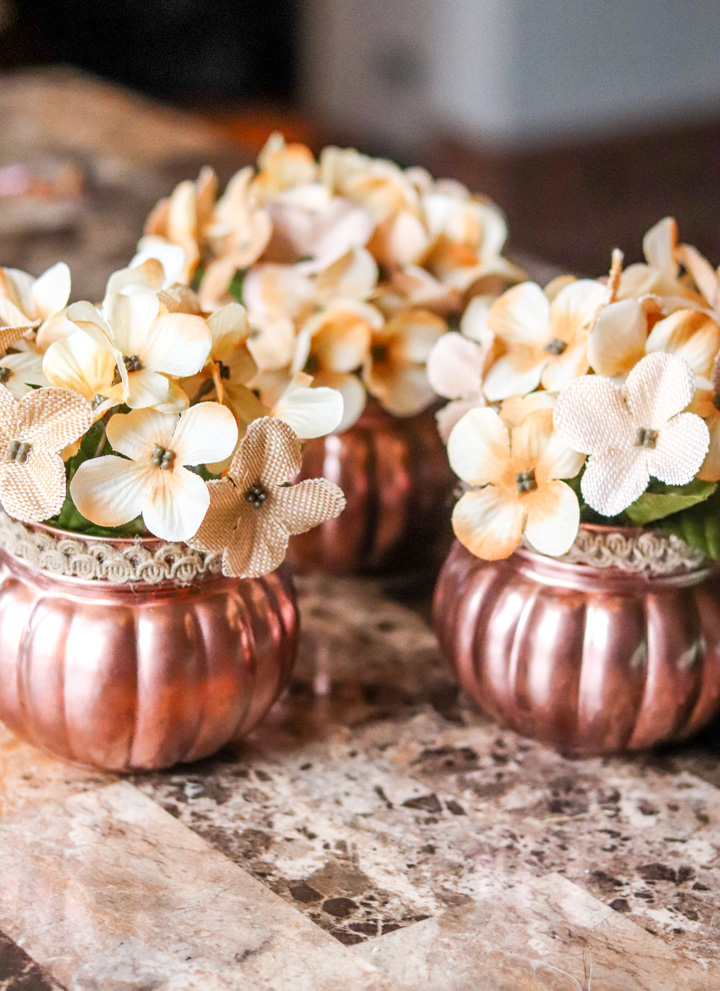
I only needed a few items from Dollar Tree. I chose three of the glass pumpkin glasses because I like how clusters of three look, but you could totally do just a single one or two, or four.
Adjust the supplies as needed. This project can cost as little as $3-4. I spent a total of $8 at Dollar Tree. The can of spray paint was around $3 but will do plenty more projects!
What you need per DIY Dollar Tree Fall Floral Centerpiece for Thanksgiving:
- 1 glass pumpkin jar (or any other dollar tree jar)
- 1 fall floral bunch
- 1 Styrofoam square
- jute or rope
Tools and other items you’ll need for the DIY Dollar Tree Floral Centerpiece for Thanksgiving:
- wire cutters
- scissors
- craft knife
- glue
- spray paint
You should definitely check out what everyone else made with a little help from the Dollar Tree:
- DIY Centerpiece for Your Thanksgiving Table by Apron Strings and Other Things
- Grandma’s Pink Cherry Salad by Day to Day Adventures
- Homemade Holiday Planner by Family Around the Table
- Gnocchi with Pumpkin Sauce by Our Good Life
- Homemade Stuffing- With Ingredients You Can Get From The Dollar Tree by The Farmer’s Lamp
- Cranberry Pecan Pie Crust Cookies by Tip Garden
Are you ready to make your own DIY Dollar Tree Fall Floral Centerpiece?
DIY Dollar Tree Fall Floral Centerpiece for Thanksgiving
Equipment
- wire cutters
- [scissors]
- [craft/utility knife]
- [craft glue]
- copper spray paint
Materials
- 1 glass pumpkin jar or any other dollar tree jar
- 1 fall floral bunch
- 1 Styrofoam square
- jute or rope
Instructions
- Gather all of your tools and supplies. Start with spray painting your glass jars. Allow to dry at least a few hours before handling again. Set aside.

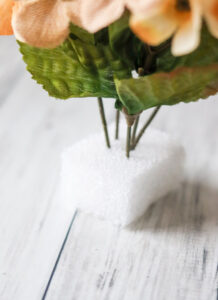
- Using a craft utility knife, trim the styrofoam block into small cubes. You will only need one.

- Using wire cutters, trim the ends of the stems off of the floral bunches measuring to be sure you have them standing out the right length.

- Insert the floral bunch stems into the styrofoam, arranging the way you see fit.
- Glue the assembled floral arrangement into the bottom of the glass pumpkin vase.

- Glue jute around the mouth of the pumpkin jar or vase.
- Allow project to completely dry at least 12 hours or overnight before using.
Look at these adorable Dollar Tree Holiday Crafts
https://justafewingredients.com/dollar-tree-diy-spooky-halloween/
https://justafewingredients.com/diy-dollar-tree-fall-floral-centerpiece/
https://justafewingredients.com/christmas-tree-table-centerpiece/
https://justafewingredients.com/handmade-family-frame-last-minute-diy-gift-idea/
https://justafewingredients.com/diy-spring-decor-dollar-store/
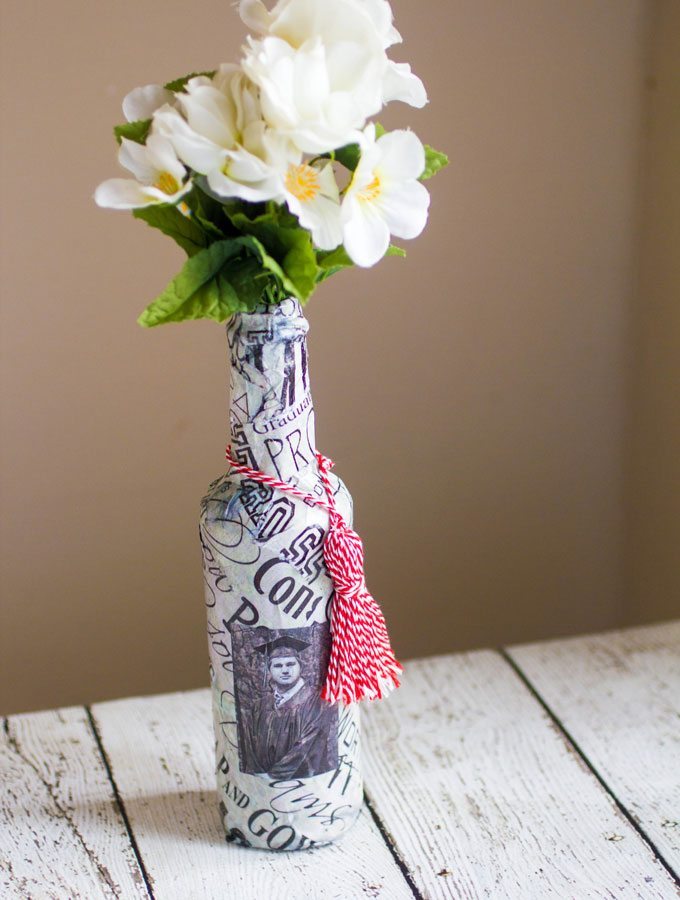
https://justafewingredients.com/graduation-flower-vase-diy-craft/
DIY Dollar Tree Fall Floral Centerpiece
Equipment
- wire cutters
- [scissors]
- [craft/utility knife]
- [craft glue]
- copper spray paint
Materials
- [1 glass pumpkin jar or any other dollar tree jar]
- [1 fall floral bunch]
- [1 Styrofoam square]
- [jute or rope]
Instructions
- Gather all of your tools and supplies. Start with spray painting your glass jars. Allow to dry at least a few hours before handling again. Set aside.
- Using a craft utility knife, trim the styrofoam block into small cubes. You will only need one.
- Using wire cutters, trim the ends of the stems off of the floral bunches measuring to be sure you have them standing out the right length.
- Insert the floral bunch stems into the styrofoam, arranging the way you see fit.
- Glue the assembled floral arrangement into the bottom of the glass pumpkin vase.
- Glue jute around the mouth of the pumpkin jar or vase.
- Allow project to completely dry at least 12 hours or overnight before using.


Super cute!